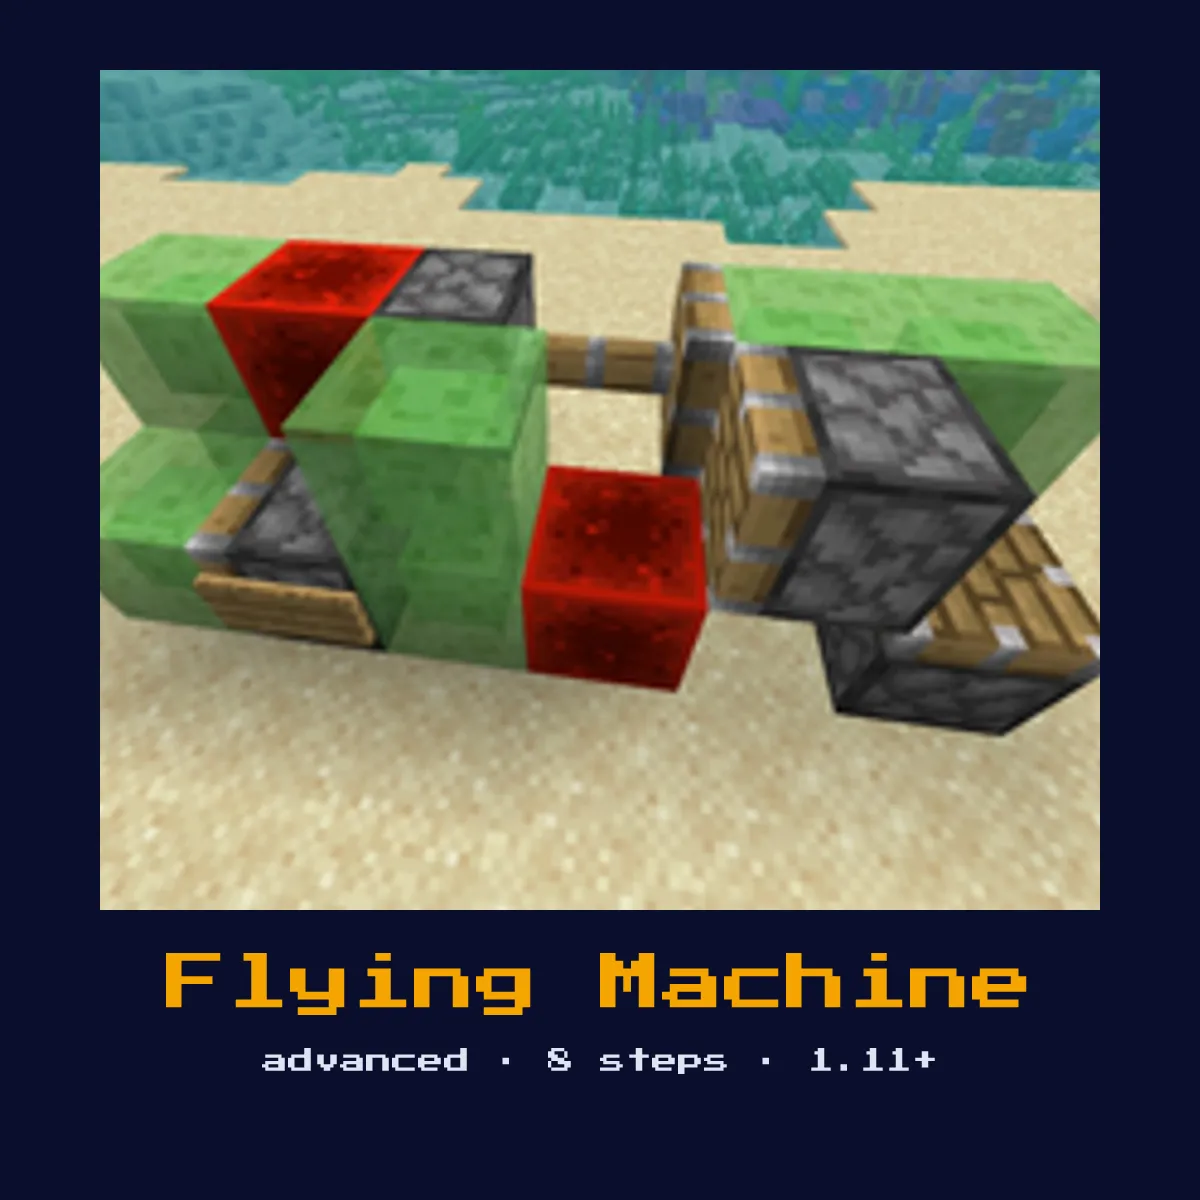
FLYING MACHINE
A self-propelling machine that flies in one direction using observers and pistons on slime blocks. Observers detect piston movement, triggering the cycle to repeat. The foundation for tunnel borers and world eaters.

Materials List
The material cost of one Flying Machine
Behind the Flying Machine parts list sits 67 crafting ingredients: 38 Slime Ball, 16 Cobblestone and 5 Redstone, and 4 kinds beyond those.
The Flying Machine leans on Sticky Piston, Piston and Observer, and every one of them is covered in full on its own component page.
| Part used in Flying Machine | How many per Flying Machine | Crafting cost of a single one |
|---|---|---|
 Sticky Piston Sticky Piston | 2 | 1 Piston, 1 Slime Ball |
 Piston Piston | 1 | 4 Cobblestone, 3 Planks, 1 Iron Ingot, 1 Redstone |
 Observer Observer | 2 | 6 Cobblestone, 2 Redstone, 1 Quartz |
 Slime Block Slime Block | 4 | 9 Slime Ball |
The full shopping list for Flying Machine
 38 Slime Ball
 16 Cobblestone
 5 Redstone
 3 Planks
 2 Piston
 2 Quartz
 1 Iron Ingot
Prices for Flying Machine are read straight off the recipes in Java Edition 26.2.
What the Flying Machine is, and what it does for you
A self-propelling machine that flies in one direction using observers and pistons on slime blocks. Observers detect piston movement, triggering the cycle to repeat. The foundation for tunnel borers and world eaters.
As a transport build it carries the player, mobs, or items from one place to another using pistons, rails, or slime-block motion. It is an advanced build that leans on careful piston timing and push-limit management, so plan the sequence before you place blocks.
The Flying Machine takes 1W x 5-7L x 2H (basic design) of room and 5 kinds of material, and it runs on any version of Minecraft from 1.11+ through to 26.2.
How the Flying Machine works: the redstone mechanics
Two observers and a push-pull piston pair sit on a slime-block base. Each observer sees the opposite piston change state and powers its partner, so the machine endlessly pushes itself forward one block per cycle. Slime blocks glue the structure and any payload together so it all travels as one.
sticky Piston, piston, observer, slime Block, and building Blocks are the moving parts of this build. The remaining blocks out of the 5 material types are there to keep those pieces aligned with each other.
Because it moves things through the world, its reliability comes down to consistent piston or rail timing, one mistimed stage strands the rider or cargo.
How to build the Flying Machine
- 1Place a slime block as the base.
- 2Attach a sticky piston to one end, facing the direction of travel.
- 3Attach a regular piston to the other end, also facing forward.
- 4Place observers: one watching the sticky piston, one watching the regular piston.
- 5The observers detect piston state changes and power the opposite piston.
- 6This creates a self-sustaining push-pull cycle: the machine moves forward each cycle.
- 7Add a block on top for the player to ride, or attach payloads with slime/honey blocks.
- 8To stop: break any component, or use a honey block brake system.
Uses & applications
- ▸As a transport build it carries the player, mobs, or items from one place to another using pistons, rails, or slime-block motion.
- ▸The Flying Machine sits at advanced level and wants 2× sticky Piston, 1× piston, 2× observer, and 4× slime Block among the 5 material types it takes to finish the whole thing.
- ▸Chain it between floors or bases to move quickly without ladders or long stairwells.
- ▸Add an automatic trigger at each end so it dispatches without a manual press.
Tips & common mistakes
- !The whole machine plus payload must stay under the 12-block piston push limit, and remember slime will not stick to honey, use that on purpose to detach sections.
- !Build and time one section of the Flying Machine completely before chaining the rest; debugging all 8 steps at once is far harder than verifying them stage by stage.
- !Keep total moved blocks under the 12-block piston limit, and feed sticky pistons a pulse of at least 2 ticks so they pull their block back instead of dropping it.
Flying Machine FAQ
How do you build a Flying Machine in Minecraft?
Place a slime block as the base. Attach a sticky piston to one end, facing the direction of travel. The full build takes 5 material types and fits in about 1W x 5-7L x 2H (basic design).

What materials does a Flying Machine need?
The main materials are 2× sticky Piston, 1× piston, 2× observer, and 4× slime Block, plus the remaining structural and wiring blocks.
How hard is the Flying Machine to build?
It is an advanced build that leans on careful piston timing and push-limit management, so plan the sequence before you place blocks. It is compatible with Minecraft 1.11+ and later.

How does the Flying Machine actually work?
Two observers and a push-pull piston pair sit on a slime-block base. Each observer sees the opposite piston change state and powers its partner, so the machine endlessly pushes itself forward one block per cycle. Slime blocks glue the structure and any payload together so it all travels as one.
How do you stop a flying machine in Minecraft?
Break any core component, an observer or piston, to halt the cycle, or build a honey-block brake that the machine grabs to arrest its motion. Many designs include a stopper block on the rail that jams the front piston when reached.
Builds that share parts with Flying Machine
Where to go next from Flying Machine: 5 contraption pages with a real connection to it.